Have you ever wanted to try out eCommerce, yet find it difficult to set up your online store, come up with all the money it takes to set one up, or have no clue how to deal with inventory?
I bet you didn’t know that Print on demand is considered the easiest eCommerce solution out there at the moment and what is even more impressive is that it requires no investment on your part.
Did you know that the Custom T-shirt Printing Market is expected to cross $10 Billion US by 2025? That’s undoubtedly a huge number to ignore.
If you want more tangible numbers, a guy called Michael Essek has been generating an average monthly income of $9,000 – $15,000 for the past 3-4 years solely from Print on Demand.
So, it’s a fact. When it comes to eCommerce, Print on Demand is the way to go nowadays. But how exactly do you do that?
Guys, if you want to make your life easier with this, there isn’t a better platform other than Shopify.
With Shopify, all you need to do is open your account, create your store, and customize your eCommerce site, with no experience required!
Moreover, you can integrate dropshipping or print-on-demand platforms with your Shopify store to add products and automate sales on your eCommerce site without having to buy inventory, hold stock, or process orders yourself! This is the easiest and best solution to start your own Shopify print-on-demand business, and in this article, we will show you how to do it step by step, with just a few clicks.
But What is Print-On-Demand anyway?
Print-On-Demand, or POD, is a business process where you work with a print on demand company to produce and ship finished products on a per-order basis.
You provide the printing company with the designs, after which it takes, processes, and ships the orders to the final customers.
If you’re an artist that creates cool stuff that you’d like to put on t-shirts and other types of merchandise, or even if you’re not an artist at all, you can find a POD company that can take and ship each one of your orders for a fixed fee.
That way, you can skip the upfront costs and risks that come with running a clothing or merchandise store.
So, when a person buys a t-shirt from your online store, all you have to do is pay the POD company to print the shirt and have them ship it straight to the buyer. You don’t have to do anything else.
And here is where a reliable and trustworthy Print on demand Companies like Printful come into play,
Printful allows you to integrate their platform with your online store so all orders can go straight to them automatically. This means you can leave your store running and make money on autopilot!
Yes, guys. The perfect marriage for running a successful Shopify Print on Demand Business is between Printful and Shopify. Let’s show you the easy way of doing all of this.
Creating Your Printful Shopify Print On Demand Store
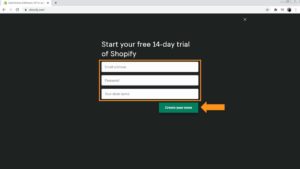
The first step towards creating a Printful store with Shopify is signing up on Shopify. Click here to create a FREE Shopify account, fill in your email address click on “Start a Free Trial.” You can select a plan later on, so initially, all you have to do is enter your email, password, and store name in the respective fields and click on “create your store” to continue.
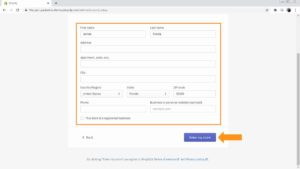
Afterward, you’ll be asked to enter your personal info and address so you can process the payments from the sales you make. Enter this information and click on “Enter my store.”
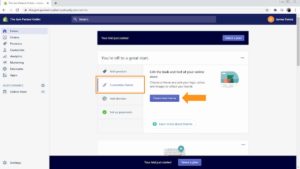
Congratulations, you’re done! You’ll land on the store’s admin dashboard from where you can manage all your store settings.
Right off the bat, you’ll be asked to add products, pick a theme, and customize your store’s domain.
You can skip adding products for starters, as you’ll do it once you integrate Shopify and Printful. So, click on the “Customize theme” tab and then on the “Customize theme” button to pick and customize a theme for your store.
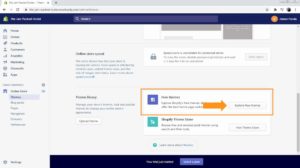
To pick a theme and get started, scroll down to the bottom of the next page and click on “Explore free themes.” Pick a theme that goes well with the brand and type of designs you plan to sell in your store.
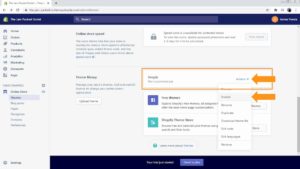
After adding the theme of your choice to the library, click on the “Actions” drop-down menu button in the column with the name of the theme you picked. Then, click on the “Publish” option.
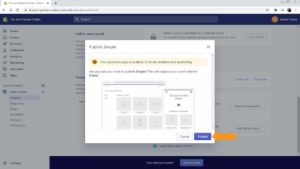
Click on the “Publish” button again.
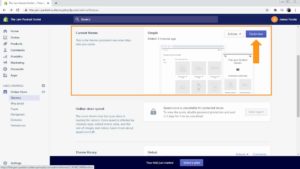
This simple action will switch the default theme into the theme you picked. You can then move to the “Current theme” section and click on “Customize” to further personalize your theme.
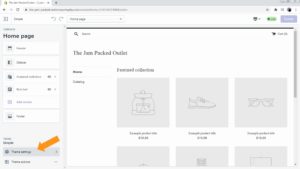
When customizing a theme through this editor, you can go straight to “Theme settings” to customize things like colors, typography, cart, navigation, social media links, the site favicon, checkout, and theme style.
At this point, you got your store up and running. You can take care of other customizations later, so let’s jump to the next step, which is connecting your brand-new Shopify store with Printful.
How To Connect Printful To Shopify
Printful is one of the most popular and longest-running POD services on the internet. It’s our top service recommendation because it integrates seamlessly with Shopify.
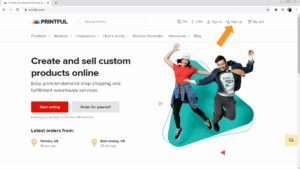
Click here to get a FREE printful account, click on “Sign up”, and complete the registration process. You’ll need an active account to integrate Printful with your store, so follow this step carefully before continuing to the next one.
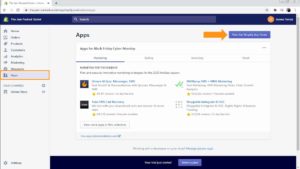
After signing up, go to your Shopify dashboard, click on the “Apps” tab, and once you’re on the apps page, click on “visit the Shopify app store”.
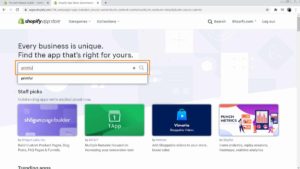
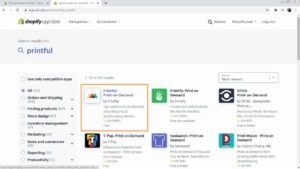
Once you’re in the app store, type “Printful” in the “Search apps” bar, and hit enter.
Next, click on “Printful: Print-On-Demand.”
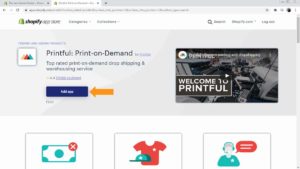
In the following page, click on the “Add app” button.
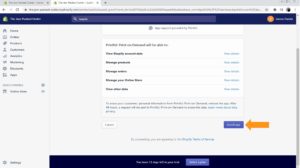
Now, scroll down to the bottom of the new page and click on “Install app.”
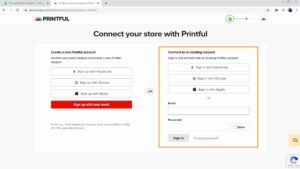
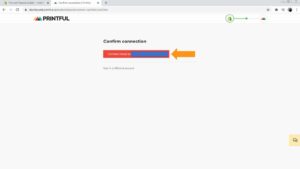
Next, you need to confirm your connection by signing in to your Printful account in the “Connect to an existing account” section.
Lastly, click on “Connect store” to confirm the integration.
With that, your Shopify store is fully integrated with Printful. Now, we would like to show you how to use Printful with Shopify, so let’s start by adding some products to the store.
Add Printful Products to Shopify
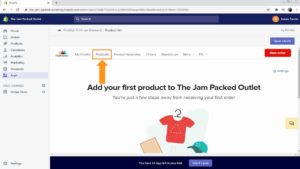
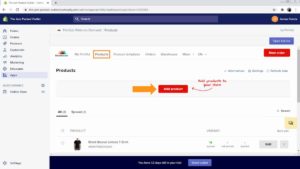
To start adding Printful products to Shopify, click on the “products” tab in the Printful dashboard.
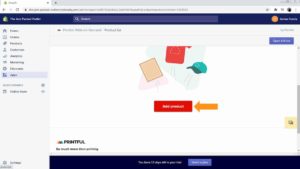
Once you’re on the “Products” page, click on the “Add product” button.
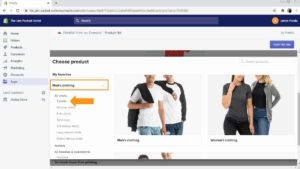
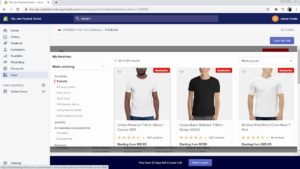
A new window will open where you can select the type of products you want to add. You will find these on the product menu to the left.
To pick a product, pick a category from the menu and click on the product type. In this example, we’re going to select a men’s T-Shirt.
After selecting a product, you can pick the models available. For instance, when you select T-shirts, you can select Premium T-Shirts, Basic T-Shirts, All-Over, and more.
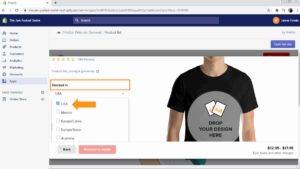
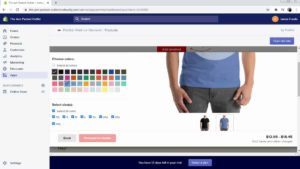
Once you’ve picked the product and model, you need to configure stock locations, the places you will ship your items from, the colors, and sizes.
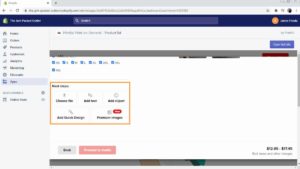
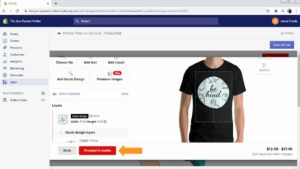
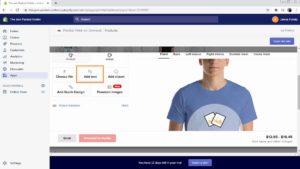
Afterward, you’re going to add the artwork to your product. You can upload a file from your computer, add text, clipart, a stock quick design, or a premium image as the artwork.
After adding the artwork you’re going to click on “proceed to media”.
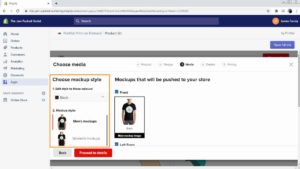
What you’ll do next is select a mockup style. This is the mockup picture that you will use to showcase the product in your store. You will find all the different mockup styles on the mockup style menu to the left. To select a mockup style, simply click on it and it will be added.
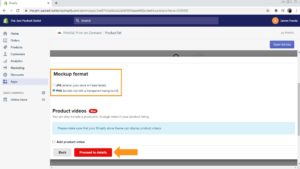
After choosing a mockup style, the next step is choosing the format. This is the image format that will be pulled to the product page in your store. There are two formats available: “JPG,” which is a smaller format and will help your site load faster, and “PNG” format which is bulkier in size but features a transparent background that helps your images pop on the product page. For this example, let’s select “PNG.” You can click on “Proceed to details” after selecting a style and format.
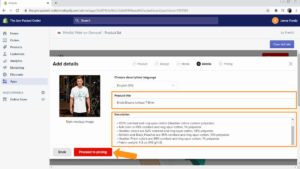
On the next page, you will enter the product details, including the title and description.
Start by entering the product title, which is the name of the design or product you’re selling.
Next, you’re going to enter the description. Printful adds the product info by default, so basically, all you have to do is describe the design you’re selling above the product info section. Once you’re done personalizing the details, you can then click on “Proceed to pricing.”
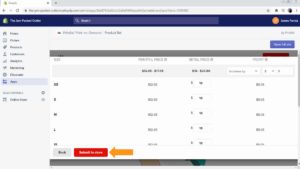
On the following page, you need to set the retail price for the product in your store along with your profits.
The price in the “Printful Price” column is the cost of ordering and fulfilling the product through Printful.
The “Retail price” column is the price for which the product will sell in your store, while the amount in the “Profit” column is what you will earn from each sale.
You can increase your profit by increasing the retail price or decrease it by decreasing the retail price. Once you’re done setting the prices and profits, click on “Submit to store”.
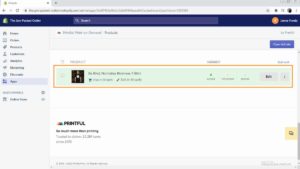
All you need to do at this point is wait until the product is imported into your store. And there you go; the product has just gone live on your Shopify site!
How to Setup Printful shipping on Shopify
A very cool thing about Printful is that it automatically sets shipping rates for your imported Printful products directly to your shipping profiles in Shopify.
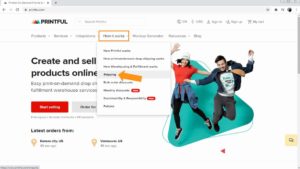
This means that the correct shipping costs will be set the moment you submit a product into your store. You can check Printful shipping rates by going to Printful.com, hovering over the “How it works” tab, and clicking on “Shipping.” There, you’ll find all individual shipping prices for each type of product.
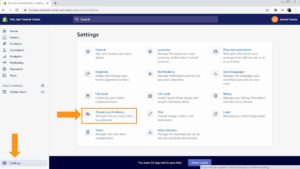
If you want to edit the shipping profiles and costs on your Shopify store, go to the dashboard and click on the “Settings” tab. Once you’re here, click on “shipping and delivery” and edit the information you wanted. However, before you do so, remember to consider all shipping costs and how they will affect your profits and bottom line.
Enabling Printful live Shipping rates with Shopify
Another convenient way to set shipping rates is by enabling live shipping rates. These are rates calculated live by the carrier according to the shipping info provided by the customer.
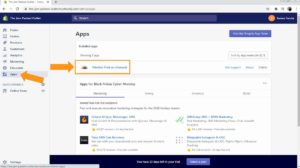
You can enable live shipping rates only if ýou’re an Advance Plan Shopify user. If that’s the case, go to your dashboard, click on “Apps,” and then click on “Printful.”
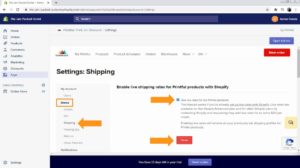
Once in the app’s dashboard, go to the “More” drop-down button and click on “Settings”.
Now, click on the “Shipping” option under “Stores,” tick the “Use live rates for my Printful products” checkbox, and click on “Save.”
Printful personalization on Shopify
One feature that your customers are going to love is personalization.
This feature allows you to include a product personalization option to your product’s page so customers can personalize the design of the product they are ordering.
You can only add personalization to new products, so let’s check out this option. First, you go to the “Products” section of your Printful dashboard on Shopify and click on “Add product.”
Now, select the product, the model, and its color and size, just like you have learned so far.
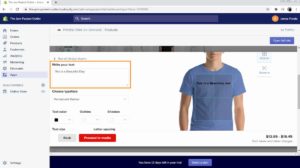
To add a personalization template to the product, click on “Add text”, and then add text to create a template your customers can personalize.
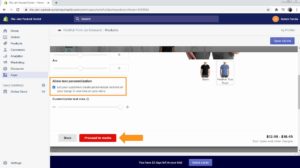
To activate the personalization feature, scroll down to the bottom of the window and tick the “Allow text personalization” checkbox. Then, click on “Proceed to media” to continue with the product setup process as we showed you a moment ago.
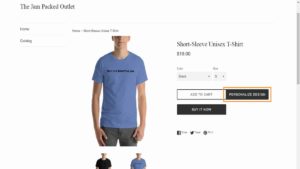
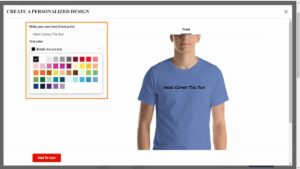
When a customer opens a product and clicks on the “Personalize design” button, it will open the design editor where they can enter their custom text and add it to their carts!
The Bottom Line
As you can see, creating a unique Print-On-Demand business online is easy with the right combination of features and platforms like Printful and Shopify. So, if you want to try your wildest POD ideas today, open your Shopify store, create your Printful account, integrate both platforms, add your products, and start promoting! If you need help setting up a print-on-demand store please contact us!


